How to flash Betaflight
Make a damn backup! And what's cloud build anyway?
Firmware Over The Years
History lesson coming, you can directly skip to flashing if you want :)
Before Betaflight 4.0.0, firmware target files were directly tied to a single board. However as the targets piled on, it got harder and harder to maintain them all individually.
As 4.0.0 denoted a major version change, the Betaflight team took the opportunity to restructure the firmware targets. Instead of having a firmware file for each board, there are now only “base” files for each MCU - STM32F405, STM32F411, STM32F722, etc. When you flash a firmware with a target selected, the base MCU firmware is downloaded and flashed to the board, ad then the target-specific configuration is applied on top of it on the first connection - this is the “Custom defaults” message you see when you connect to a board for a first time after flashing, and why it’s important to apply them, not just dismiss the popup.
As even more and more features got introduced, the flash space on some MCU’s started to become a limiting factor. Features were getting cut to save every bit of space on F411/F722 boards. With the release of 4.4.0, the Cloud Build system was introduced to allow users to select only the features they need, and build a custom firmware for their board with only those features included. This saves a lot of space, and breathes new life into the limited MCU’s.
This gave rise to some deeper issues however, as targets needed to specify the actual hardware meant to be used, and in the first few months there were many targets with missing or incorrect hardware definitions. This has been mostly resolved by now, and we’re working much more closely with the manufacturers to ensure that the targets are correct, and new targets are up to spec.
Flashing
Hopefully I didn’t lose your attention with the history lesson, because now we’ll actually go over the flashing process.
If you just got a pre-built drone, the last thing you want to do is to flash it! The manufacturers ship them almost fully set-up with custom PID tunes and more, and you’ll lose all of that if you flash a new firmware!
Set up what you need in Betaflight, and just go fly!
Backup
Before you do anything, make a backup of your current configuration. This can be done in different ways, all of which should basically leave you with a text file containing all of your settings.
diff all - The best way to back up the current config. Just send
diff allin the CLI, and it will list out all of the changes compared to a zero-config statedump - This will dump the entire configuration, including resource pin definitions, DMA and timer settings, basically the entire target. Useful if you want to transfer absolutely everything if you believe a newer version of your target is off in some way.
Then there’s a
button in the bottom right that will save the entire CLI output to a file.
Options
Now that you have a backup, you can click the Update Firmware button, and it will bring you to a Firmware Flasher tab with all of the options you need to choose from.
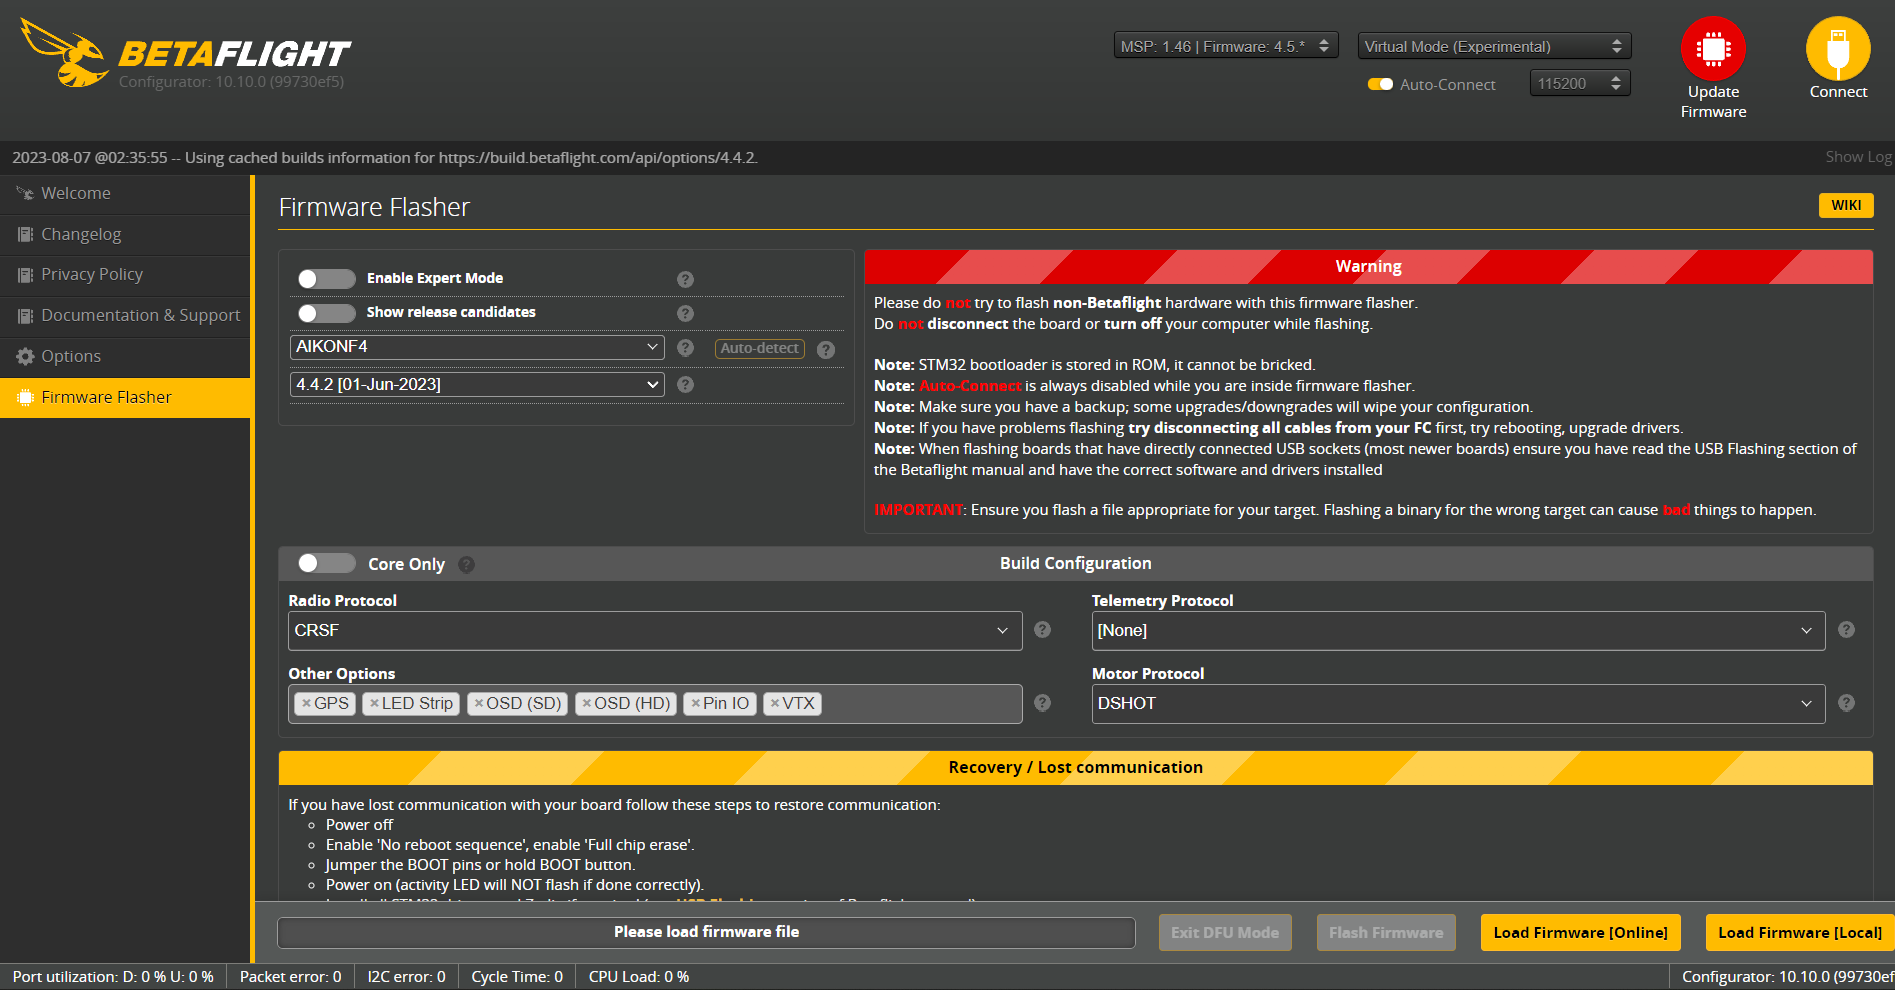
Target Selection
The first dropdown you see is where you pick the correct target for your boards. In the newest version of the configurator there is an autodetect button, but it can’t always be correct, so you should check it manually. Make sure it’s the correct target for your hardware, as flashing the wrong target can at best cause some weird issues, and at worst prevent all features from working, necessitating a reflash.
Firmware Version
In this dropdown you get to pick the version. If you want to flash, it’s usually to get the newest, freshest, most juicy features that Betaflight has to offer. So just pick the one that’s listed at the top, and you’re good to go.
If you enable both the Expert Mode and Show release candidates toggles above the dropdowns, you’ll see another dropdown where you can switch to extra versions, so you’d be able to select Release Candidate and even master-brach builds. These are the newest of the new, and are usually not recommended for general use, but if you want to help test the new stuff before it’s released, you can do that here as well.
Build Options
This is where the Cloud Build system comes into play. You select your Radio, Telemetry and ESC protocols and pick your features that you want to include.
If you enable Expert mode, you can also manually add different defines to the build. This is usually not needed, but may come in handy if your target is missing some hardware definitions. If you further select Development builds, you’ll get an option to select a specific commit or even an unmerged PR to build from. If you don’t know what that means, you probably don’t need it.
The Point Of This Entire Article
Now that you have everything set up, you can click the Load Firmware [Online] button, and it will start building the firmware file, and once it’s finished it will be downloaded. If you’re using a popular board with the default settings, chnces are that there is already a firmware file cached on the build server and it should be downloaded almost instantly, same if you’re loading it again with the same settings. If not, it may take a bit longer, but it shouldn’t be more than a minute or two.
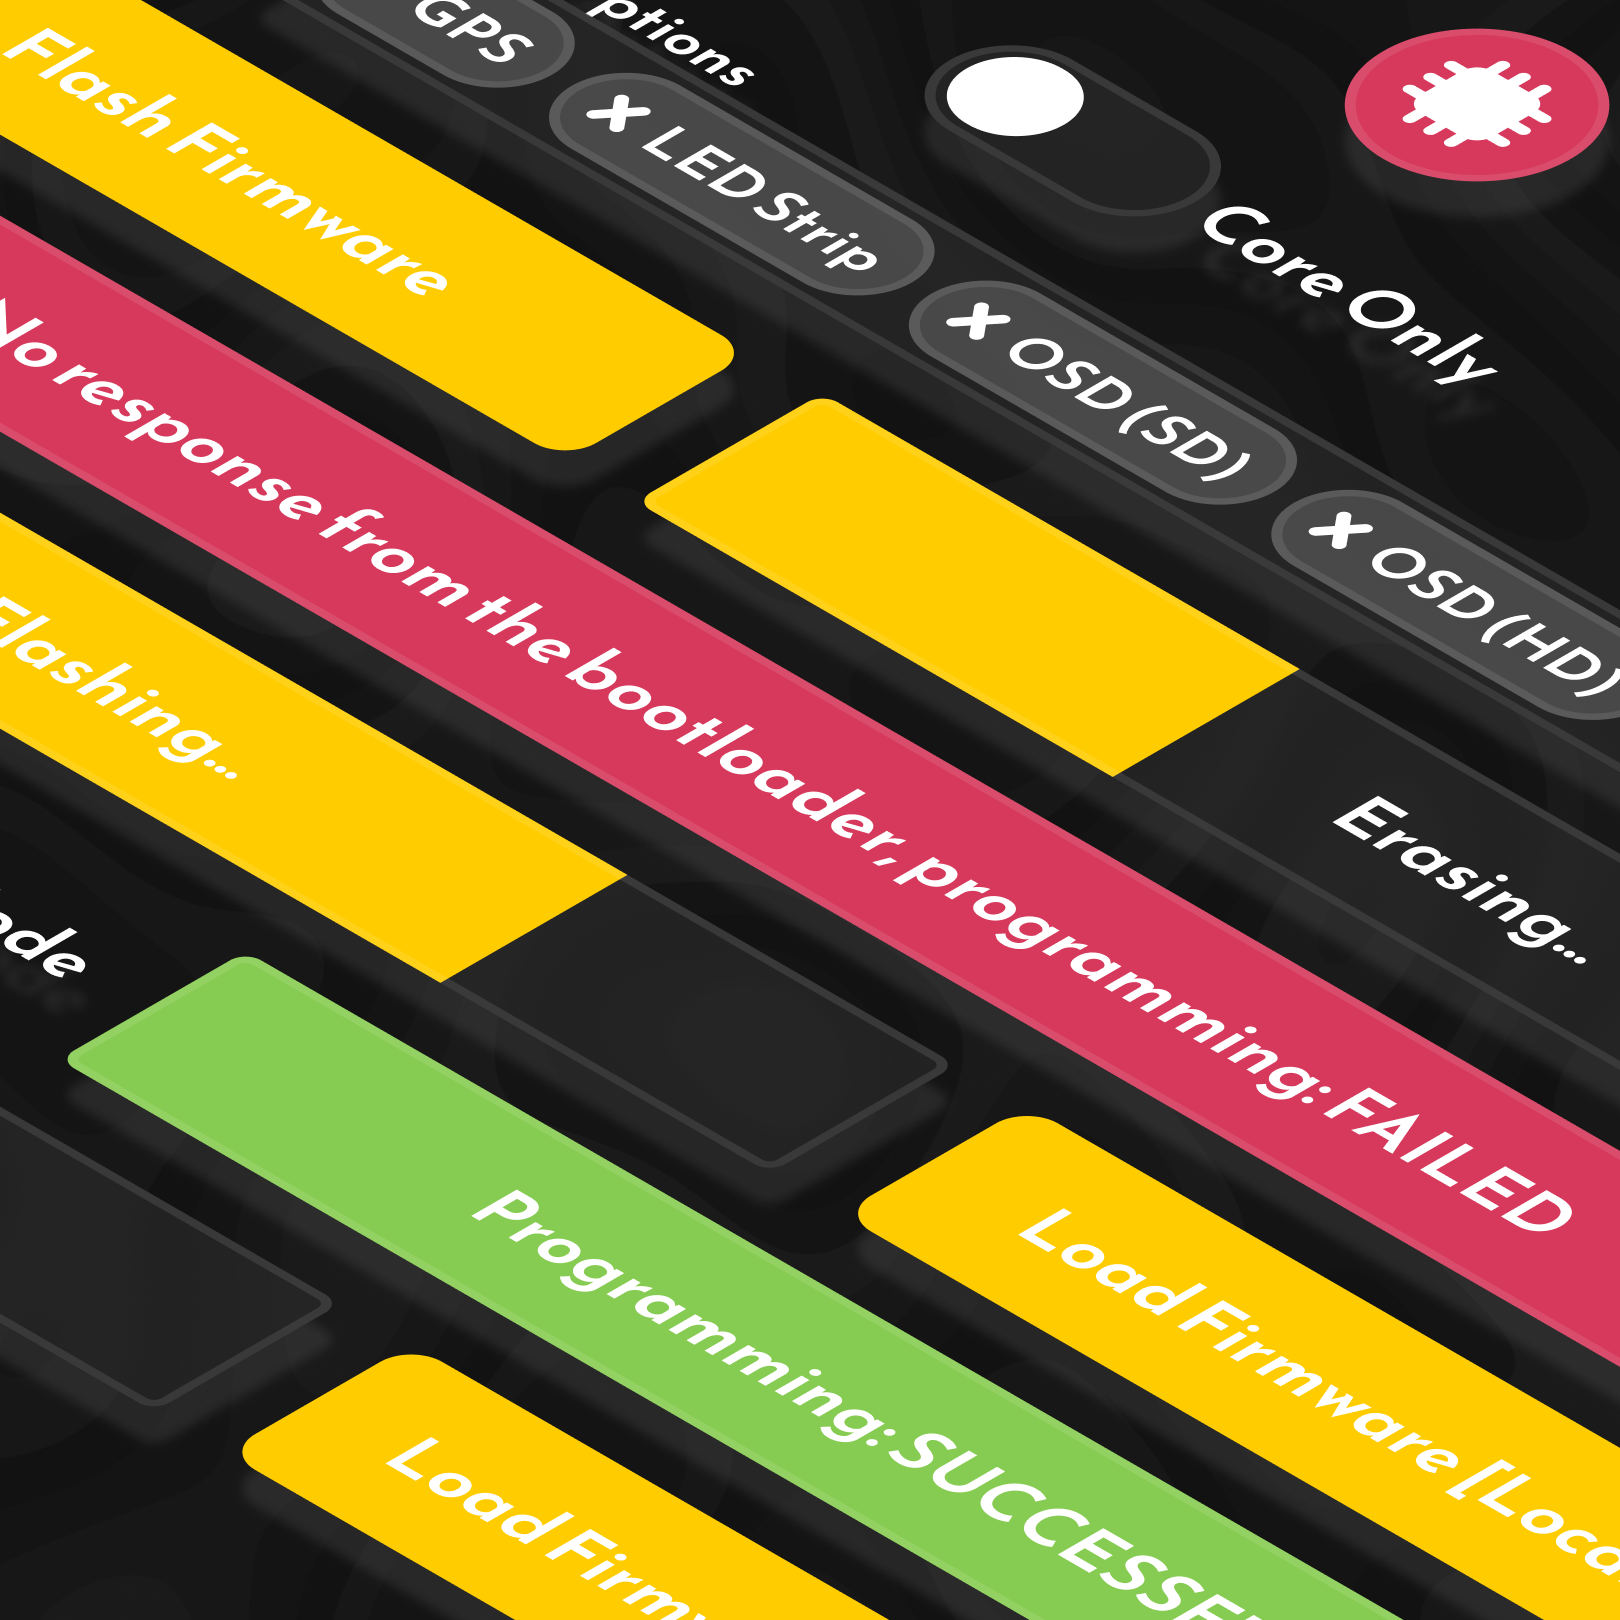
Once the file is downloaded, the Flash Firmware button will become active, and you can click it to flash the firmware to your board. It will quickly re-connect to the bootloader, erase the previous firmware, and flash the new. This may take a minute or two, definitely do not disconnect the board during this process, as it may soft-brick it, and you’ll have to flash it again.
If all went smoothly, you should see the progress bar look a bit like this:
You can now disconnect and reconnect to the board, and you should may see a popup asking you to confirm the custom defaults. The answer is almost always yes, unless you know what you’re doing and have a good reason not to.
You can now restore your configuration from the backup you made earlier in the CLI. If you’re going from 4.3 to 4.4, you can just click Load from file and select the file you saved earlier, it may complain about some minor things that have changed, but it should be easy to set up again. Like the craft name, and some OSD settings. If you’re going from an older version, it’s best to only copy over the Ports, Receiver, Modes and OSD, and set up the PID’s and filters from scratch.
Troubleshooting
The largest cause of issues with the flashing process comes from driver issues, mainly on Windows. The most common problem is that the Configurator cannot innitiate a connection to the bootloader, and it will just sit there and wait for it to connect, then time out and throw an error. Download and run the ImpulseRC Driver Fixer with the FC connected, and it should fix the drivers and even put your FC into bootloader mode, so you can flash it right away. Just make sure to enable Expert Mode and No Reboot Sequence in the Configurator before you click Flash Firmware